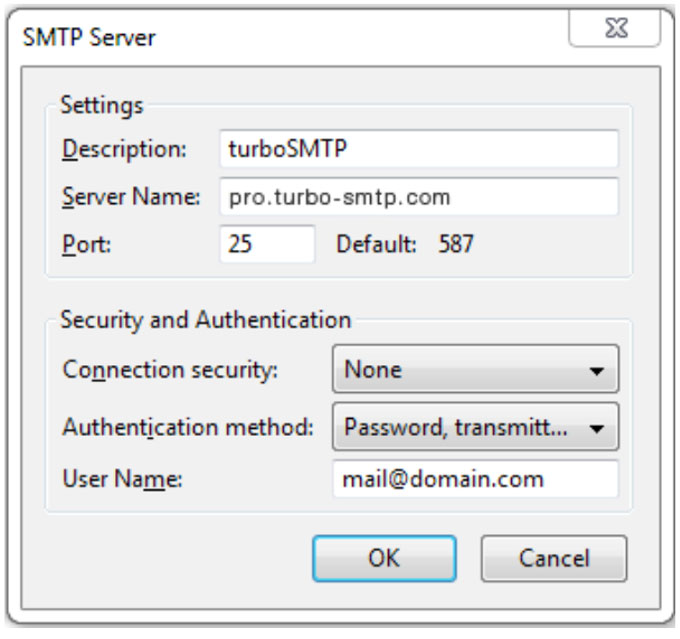
TurboSMTP is one among the most widely used SMTP being preferred by users for sending bulk emails. Here in MailGet, you can easily connect with TurboSMTP for sending emails.
In this documentation, we will show you the easy steps for integrating TurboSMTP with MailGet.
Let start…
How to set up the TurboSMTP server for MailGet
1. Login to your TurboSMTP account, or select your plan if you did not have it please:
https://serversmtp.com/en
2. Prepare your TurboSMTP settings details.

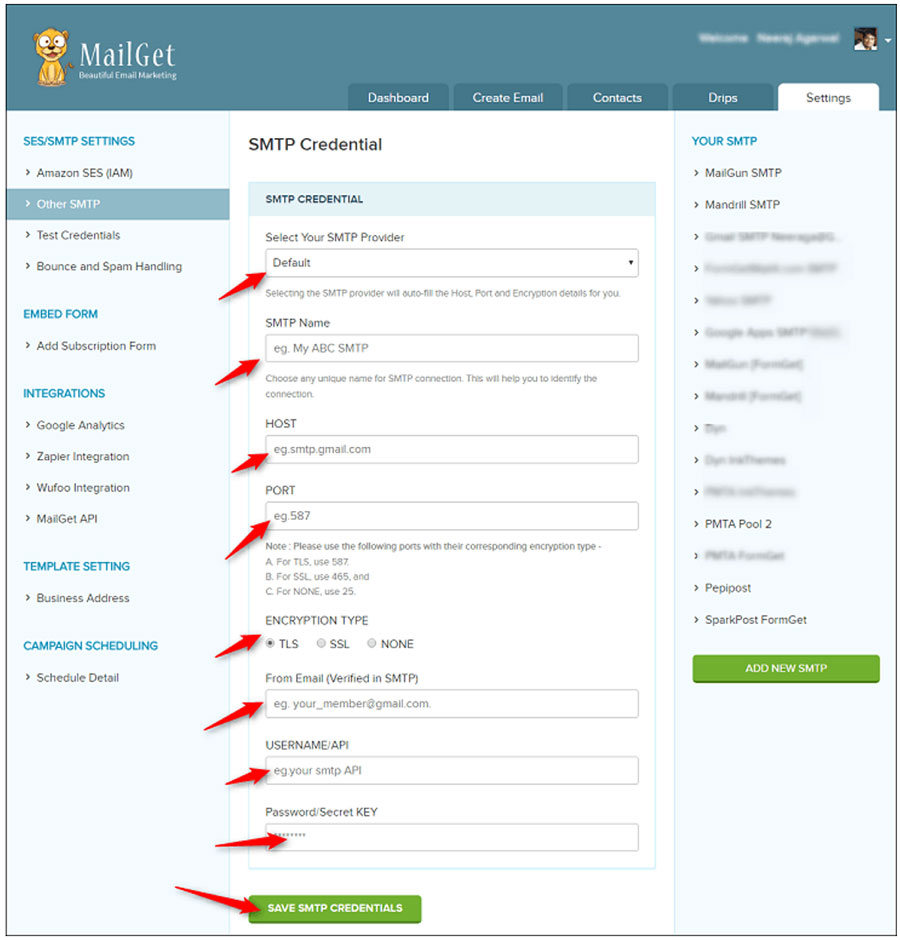
3. Now move onto your MailGet account and put the SMTP details which you got from your TurboSMTP account.
Here’s are details which you will have to put:
| Information | Value |
|---|---|
| Select Your SMTP Provider | Any Other/ Custom SMTP |
| SMTP Name | TurboSMTP |
| HOST | pro.turbo-smtp.com |
| PORT | 587 |
| ENCRYPTION TYPE | Select TLS |
| From Email (Verified in SMTP) | Write the email which you’ve verified in your TurboSMTP account |
| USERNAME/API | Write here the Consumer Key (see how to create your API Keys) |
| Password/Secret KEY | Write here the Consumer Secret (see how to create your API Keys) |
4. Once you put the SMTP details, then click on “SAVE SMTP CREDENTIALS“.

Congratulations!
Once you’re done with all the above steps, you can then start sending emails.