To start sending out emails with Ultramailer it’s necessary to configure your SMTP settings – that is, tell Ultramailer which outgoing server it must rely on to deliver your messages.
Here’s how to.
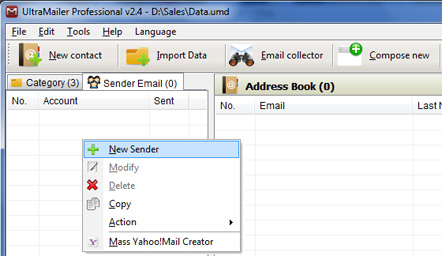
1. In the main page of the client, select “Sender Email”.
2. Right click and select “New sender”.
3. Then fill the information required in the following popup window:
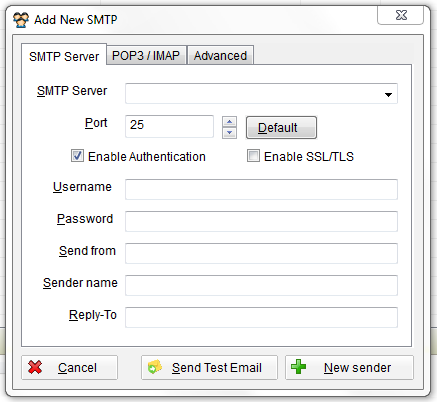
- SMTP Server: your SMTP host name. If you don’t know it, you can have a look at our list of the major ones.
It’s important to remember, anyway, that if you are setting up a bulk email campaign and need to send out a certain amount of newsletters with Incredimail, you should definitely opt for a professional SMTP service that will ensure the highest deliverability.
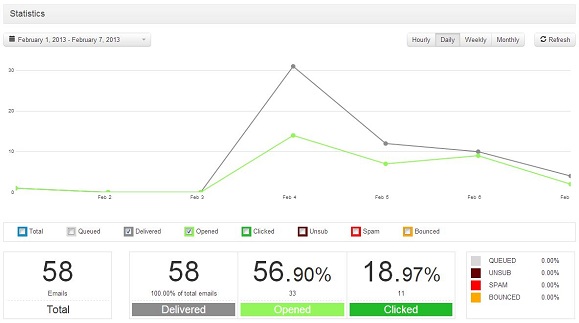
Moreover, turboSMTP, will provide advanced statistics to understand its efficiency (monitoring click rates, open rates etc.) and allow you to set an automatic unsubscribe link.
- Port: default port is 25, but there are other options according to the type of connection you want to set.
- Enable authentication:flag it if you want to send authenticated emails (via username and password, that you need to provide below). For more information check our article about SMTP authentication
- Enable SSL/TLS: flag it if you want to send encrypted emails. In this case you’ll need to change your port to 465.
- Username & password: enter your Consumer Key and Consumer Secret (see how to create your API Keys).
- Sender from: your sender email.
- Sender name: the name that will appear as sender.
- Reply-to: the email address that will receive your recipient’s replies.
That’s it, now you can start sending emails with Ultramailer.</