If you’re using Atomic Mail as a mail client, it’s essential to configure your SMTP settings in order to correctly send emails out.
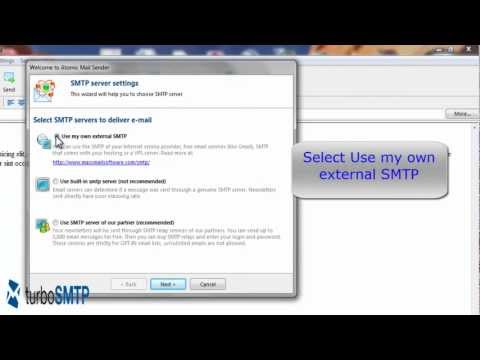
To set your SMTP on Atomic Mail, go to “Common Settings” in the “Settings” menu, and click on the “SMTP” label, then choose “External SMTP only”:
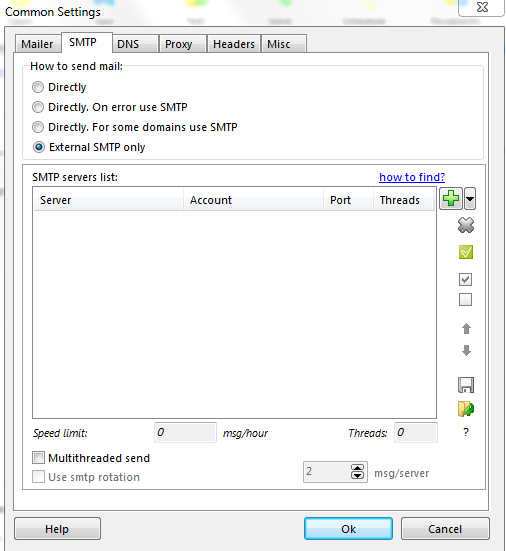
Then, this window will appear:
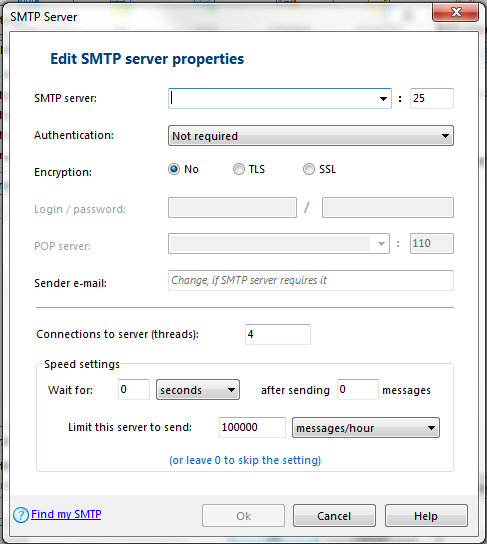
Now you simply need to enable your outgoing server entering all the information required, that is:
- SMTP server: in the first field put your server’s name (e.g. smtp.gmail.com for Gmail): if you don’t know it please read our article about the most common ones.
It’s important to remember, anyway, that if you are setting up a bulk email campaign and need to send out a certain amount of newsletters with Incredimail, you should definitely opt for a professional SMTP service that will ensure the highest deliverability.
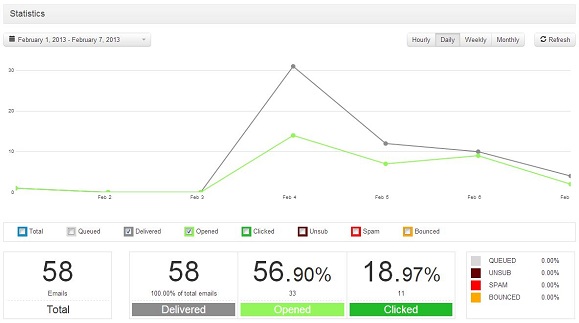
Moreover, turboSMTP, will provide advanced statistics to understand its efficiency (monitoring click rates, open rates etc.) and allow you to set an automatic unsubscribe link.
Now back to Atomic Mail. The other field is the port: the default one is 25, but you can choose among others depending on the type of connection you have.
- Authentication: select the type of authentication you want to send your emails. To know more have a look at our general article on SMTP configuration.
- Encryption: if you want to send encrypted emails via SSL or TLS, flag the box and then enter your username and password. If you’re using turboSMTP remember to use your Consumer Key and Consumer Secret instead of username and password (see how to create your API Keys).
- POP server: it’s the server that takes care of receiving your emails, so it’s not directly connected to SMTP – even if it’s essential to get all incoming messages. More info can be found on our series of articles about POP and SMTP.
- Sender e-mail: if you want to set another email as the sender address, write it here.
You can also configure the sending limits of your server, but we suggest not to deal with these advanced settings if you don’t need to.
And here’s a video tutorial: