To start sending emails with Max Bulk Mailer it’s necessary to configure an SMTP server – that is, the machine that takes care of the email delivery process: every provider has its own, with a specific name and address.
Remember however that only a professional SMTP service can ensure you the highest deliverability, avoiding your messages to be filtered out by ISPs’ antispam shields. So if you intend to use Max Bulk Mailer for its primary scope – putting up a mass email campaign – you should definitely consider to switch to such a service. If you don’t, and rely on a normal, non dedicated SMTP server like the ones associated to common email providers (Gmail, Hotmail etc.) you run the risk to lose a lot of emails away – without you even knowing.
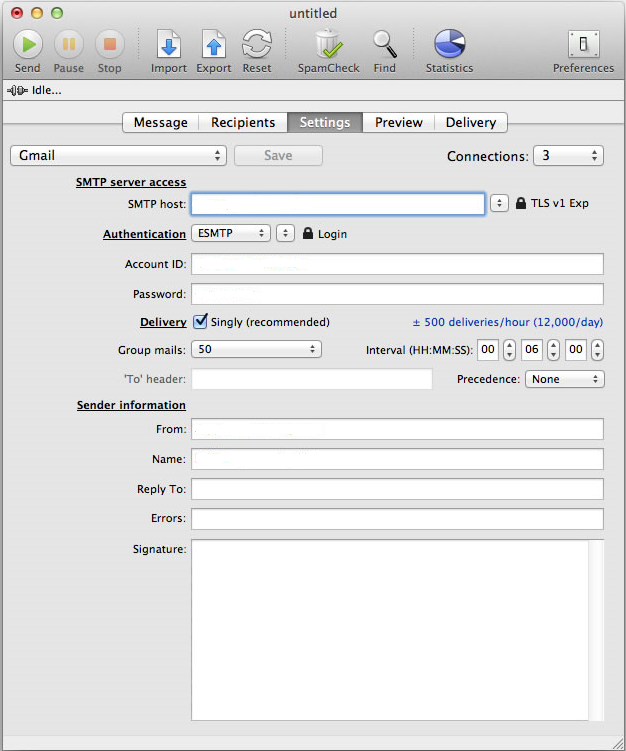
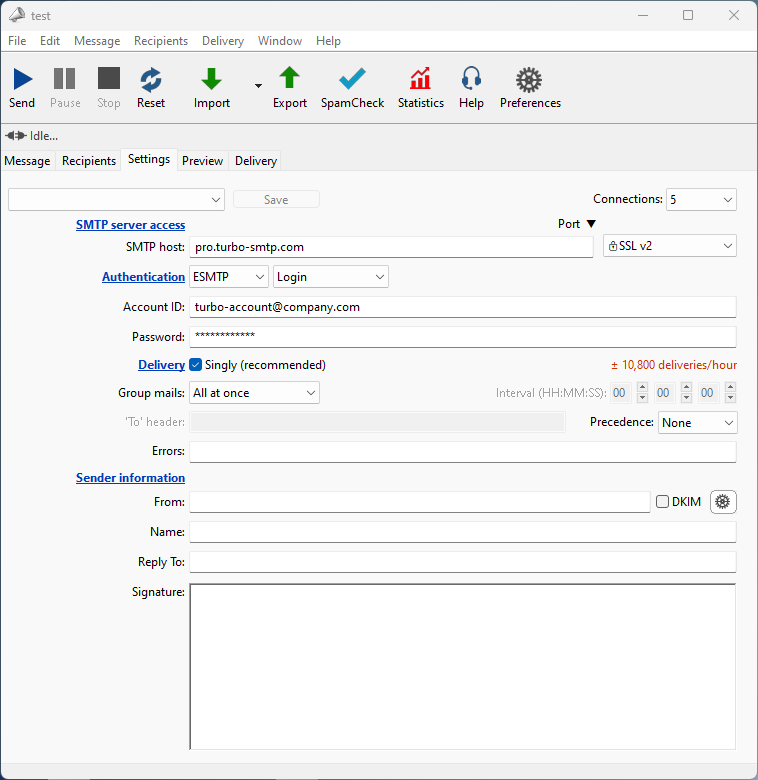
To configure your SMTP server for Max Bulk Mailer, you must fill the required fields in the “Settings” menu:
- SMTP host: your SMTP server name. If you don’t know it, have a look at our list of the major ones.
- Authentication: if you want to send emails with authentication, choose this option and then set your username and password in the fields below (if you’re using turboSMTP, remember to use your Consumer Key and Consumer Secret instead — see how to create your API Keys).
- Delivery: flag “Single”.
- Sender Information: all the data about the email address that will be taken as sender and its details (name, signature etc.)
That’s it, now you can start sending out messages with Max Bulk Mailer! Here’s a quick video recap, if you need it:


