If you use Windows Mail to send and receive your emails, it’s necessary to configure the right SMTP settings once you start the client. There are loads of common SMTP servers associated to email providers and ISPs: just remember that only a professional SMTP service will guarantee a full deliverability to your messages – an vital issue if you’re creating a newsletter campaign or simply sending a mass email.
Now here’s how to do the configuration of an SMTP on Windows Mail:
1. Right-click on your email account on the left menu and select “Properties”.
2. Choose “Servers”; this window will appear:

3. Fill the voices entering your POP and SMTP name (if you don’t know it have a look at our list of POP and SMTP parameters) and your email username and password.
4. If you have chosen to send emails with authentication, click on “Settings…”; this window will appear:
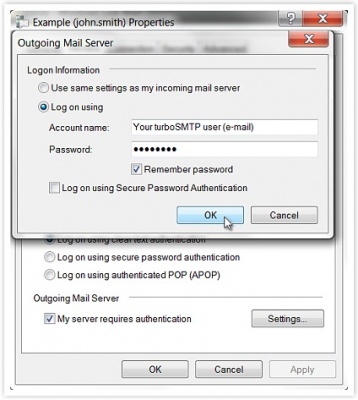
5. Select “Log on using” and enter your username and password. Click OK.
That said, however, remember that in general Windows Mail is not the right tool for email marketing (having been created mostly for one-to-one messages and not for mass email sending).
Beyond the problems with SMTP servers, Windows Mail can therefore generate other difficulties when it comes to send a newsletter. That’s why we recommend that you rely on a dedicated sending software like SendBlaster: it’s the best way to manage your email campaigns & lists!