Setting up your DNS records is an important step that will enable you to better reach your subscribers’ inboxes. You’ll minimize the risk of providers mistaking your emails for spam and increase your deliverability.
To correctly set up turboSMTP DNS records on your host, follow the instructions below.
(Read time: 2 minutes)
Read also: DNS Records and Emails: Why a Proper Setting Helps Improve Deliverability
DNS Records: Setup Instructions
1. Login to both turboSMTP and your host’s control panel
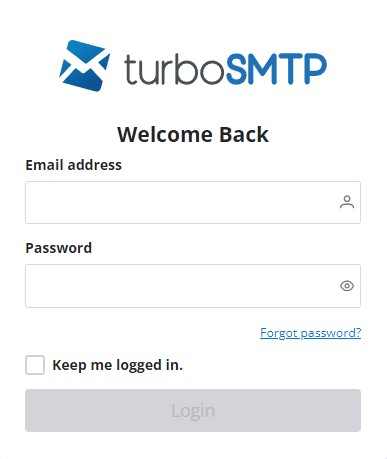
Access your turboSMTP account using this link. Enter your username and password (figure 1).

Access your host’s control panel. Here you will add the DNS records that you’ll find at Step 3 below.
On the home page of your provider’s website, find the Customer Area or Login button then log in using your username and password.
2. Select DNS Records
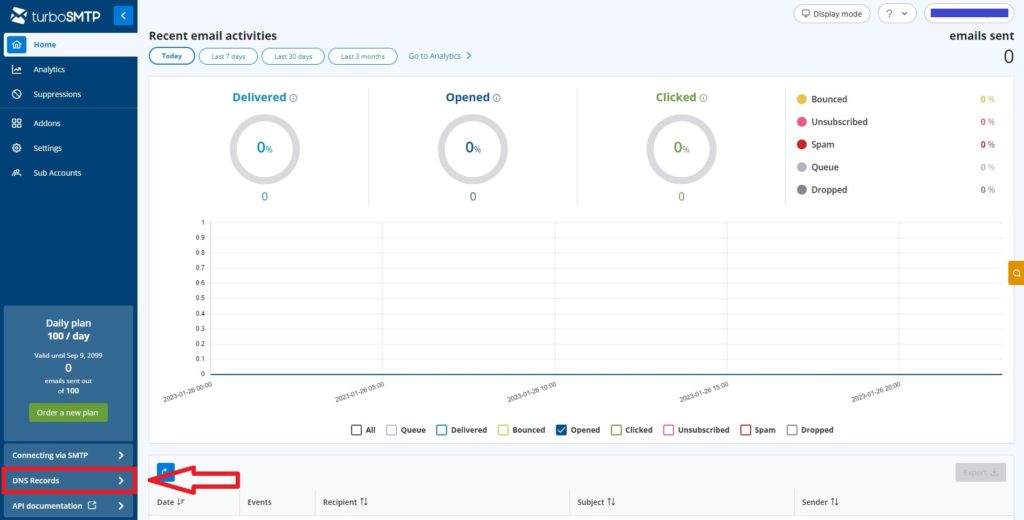
In your turboSMTP account, click the menu option marked DNS Records. You’ll find it in the sidebar in the lower left corner (figure 2).

3. Copy the SPF and DKIM records into your host’s control panel
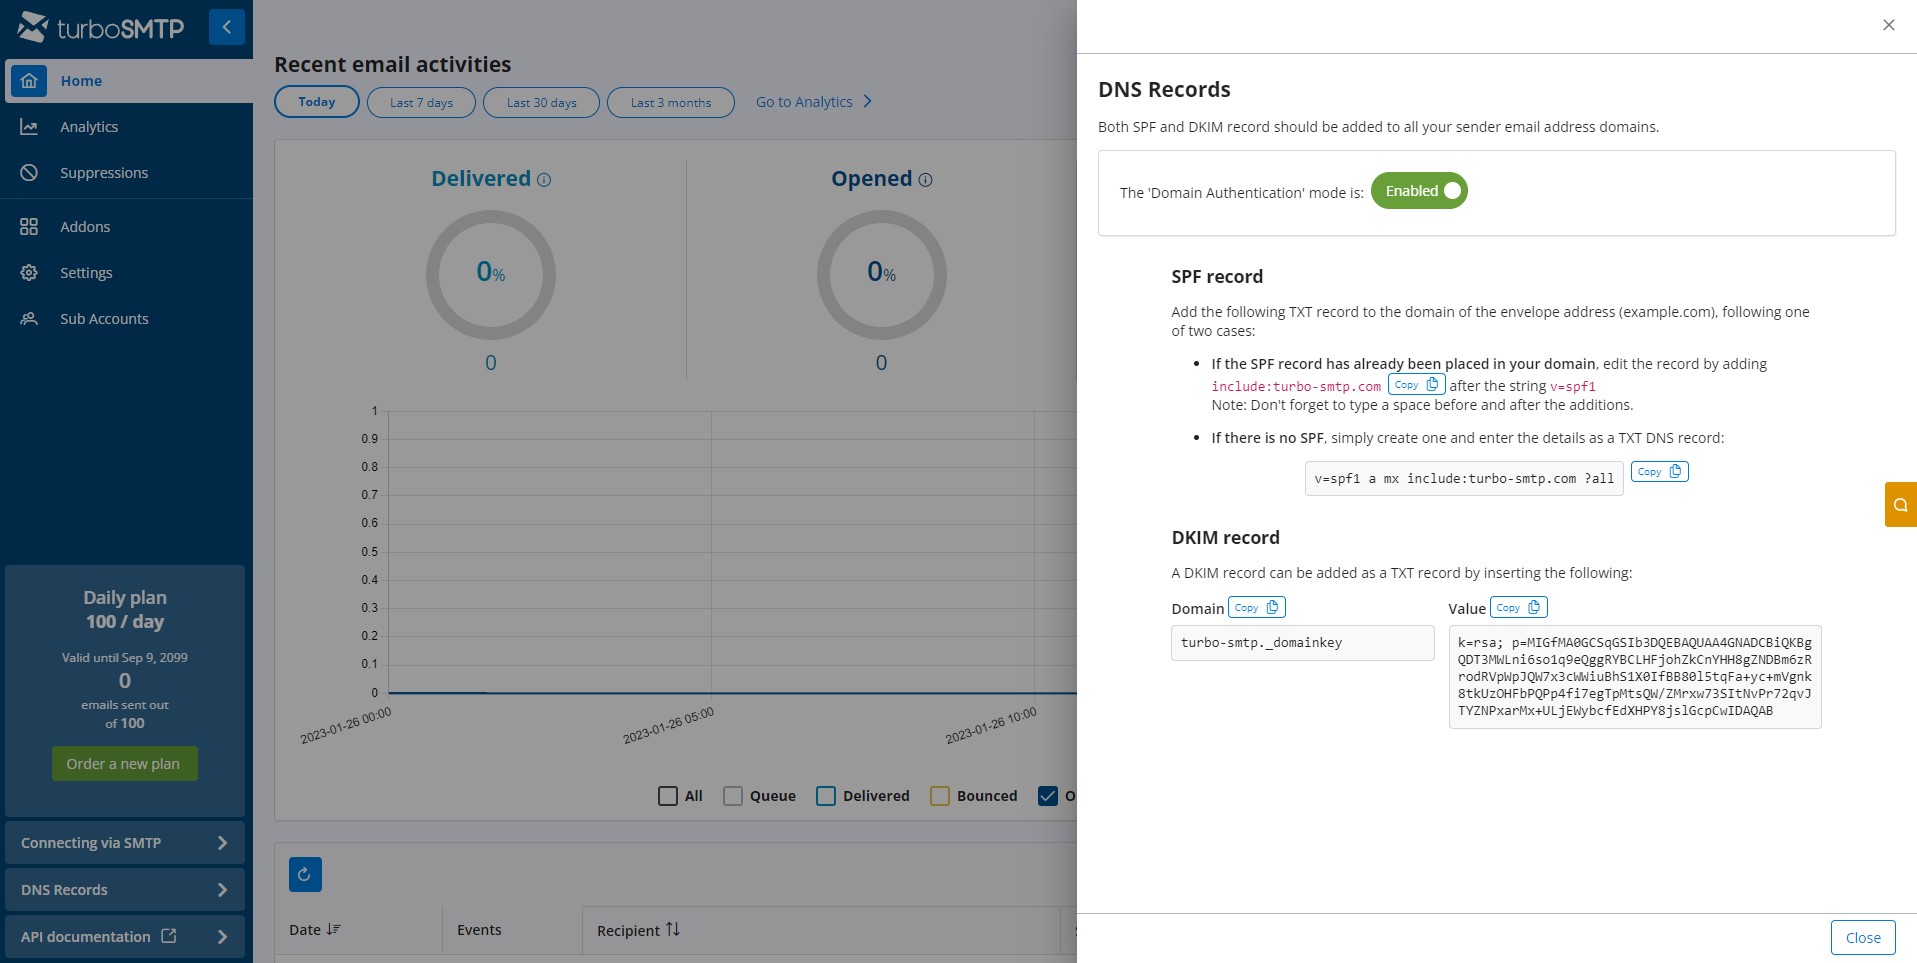
The DNS Records page displays the SPF and DKIM values (figure 3). These values are required for domain authentication. They must be placed in the control panel of your host and should be added to all your sender email address domains.

In the control panel of your hosting provider, locate the sender domain you want to configure and click its DNS management page.
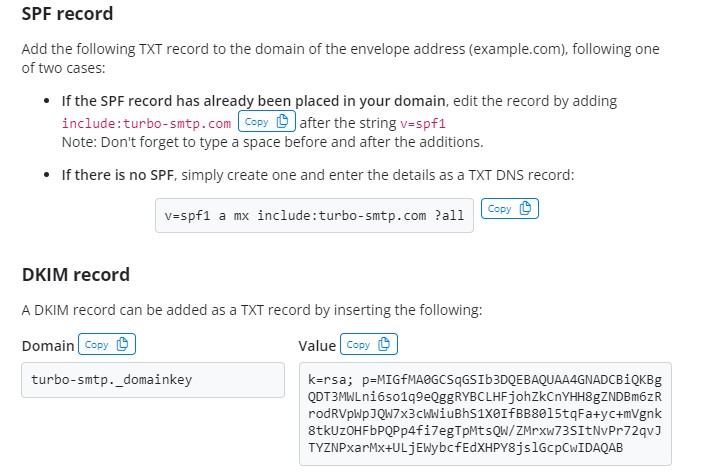
Enter the record below (figure 4) or ask your provider to do it for you.

SPF record configuration
On your host’s DNS management page, look for a TXT record starting with [ v=spf1 ]. This is your SPF record. It identifies the mail servers and domains allowed to send email from your domain.
1. SPF record already exists
If an SPF record has already been placed in your domain, edit the record by adding turboSMTP.
Add [ include:turbo-smtp.com ] between [ v=spf1 ] and the end of the SPF [ ?all ].
Don’t forget to type a space* before and after the additions.
At the end of the record, instead of [ ?all ], you might find other strings such as [ -all ], [ +all ] or [ ~all ]. Don’t worry. Those are all valid ways to write an SPF record.
Example of a correctly configured SPF in Aruba:
‘v=spf1 a mx include:turbo-smtp.com include:aruba.it ?all’
*NOTE: always type a space before and after a string
2. No SPF record
If no SPF record has been placed in your domain, you can create one. Enter this string in the field ‘Value’- [ v=spf1 a mx include:turbo-smtp.com ?all ]
DKIM record configuration
A DKIM record can be added as a TXT record by inserting the following:
- Host:
[ turbo-smtp._domainkey ] - Valore:
[ k=rsa; p=MIGfMA0GCSqGSIb3DQEBAQUAA4GNADCBiQKBgQDT3MWLni6so1q9eQggRYBCLHFjohZkCnYHH8gZNDBm6zRrodRVpWpJQW7x3cWWiuBhS1X0IfBB80l5tqFa+yc+mVgnk8tkUzOHFbPQPp4fi7egTpMtsQW/ZMrxw73SItNvPr72qvJTYZNPxarMx+ULjEWybcfEdXHPY8jslGcpCwIDAQAB ]
Once you’re finished, you’ll need to wait 48 hours for DNS transmission to complete.
During this period we recommend that you keep the click tracking link disabled in turboSMTP.
Once 48 hours have passed, enable domain authentication from the DNS Record page of your turboSMTP account (figure 5).

Encountering problems setting up your DNS records?
TABLE OF CONTENTS
YOU MAY BE INTERESTED
Do you want to improve the performance of your email campaigns?