After activating turboExecutive, you will receive an email containing your configuration data. You can also find this information in your customer area by clicking the “Configuration” button at the bottom of the right column.
How to set up an existing account
- Start the Windows Mail application.
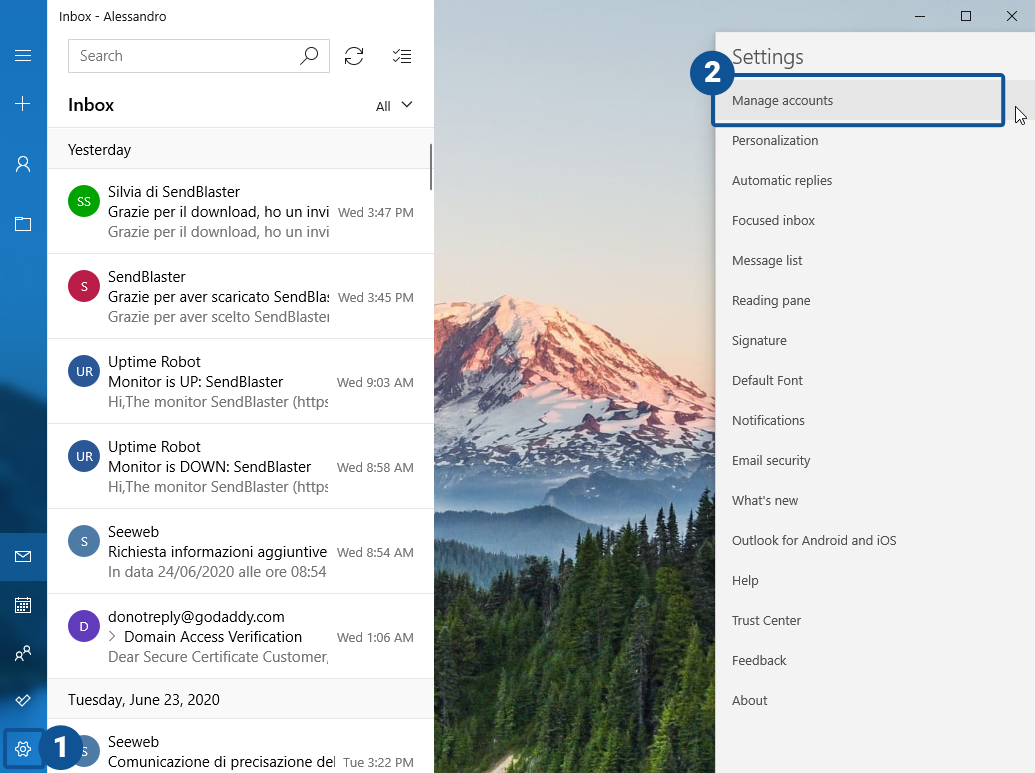
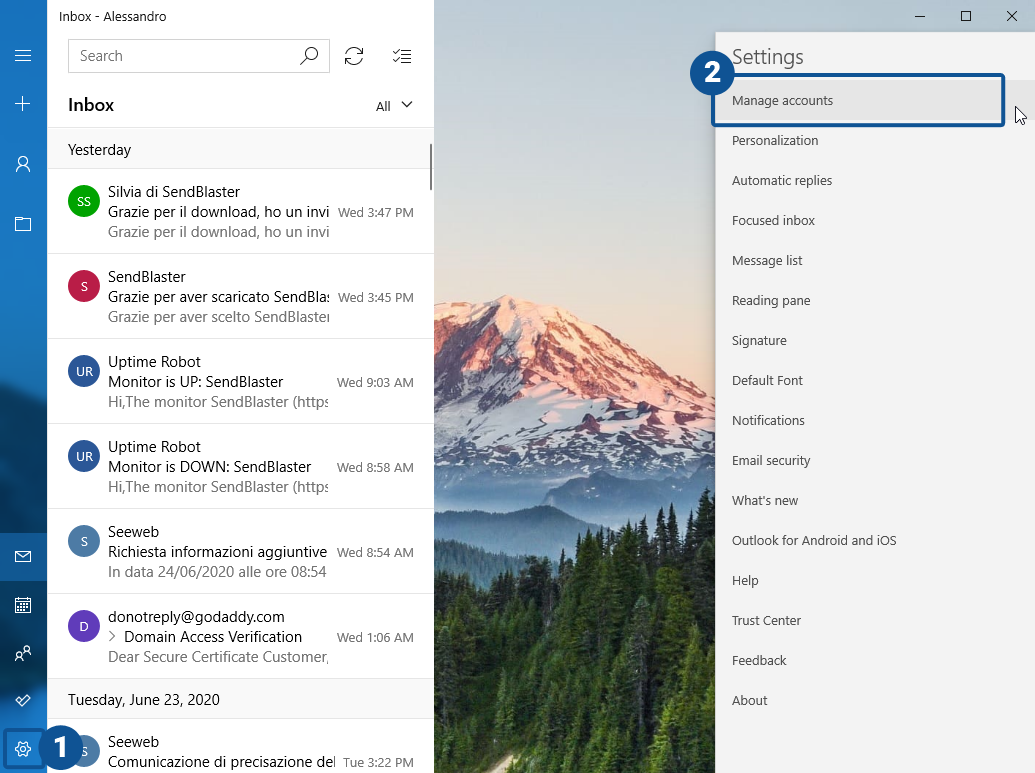
- In the bottom left menu, select the gear icon, then choose “Manage account”.
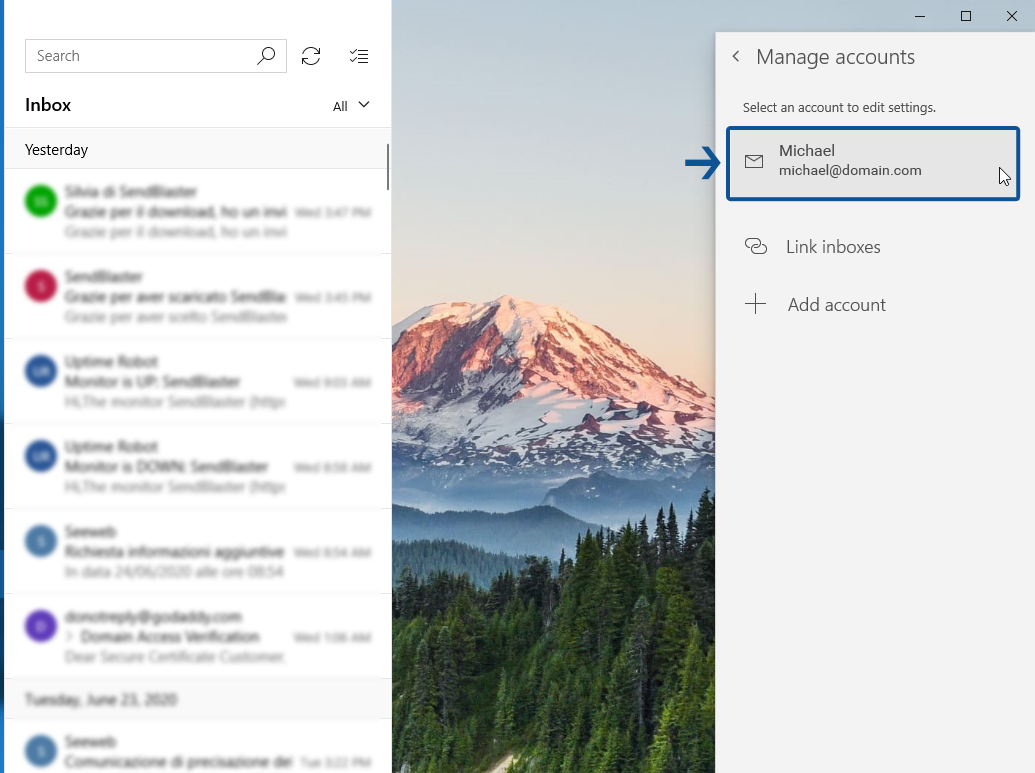
- Select the account you want to edit.
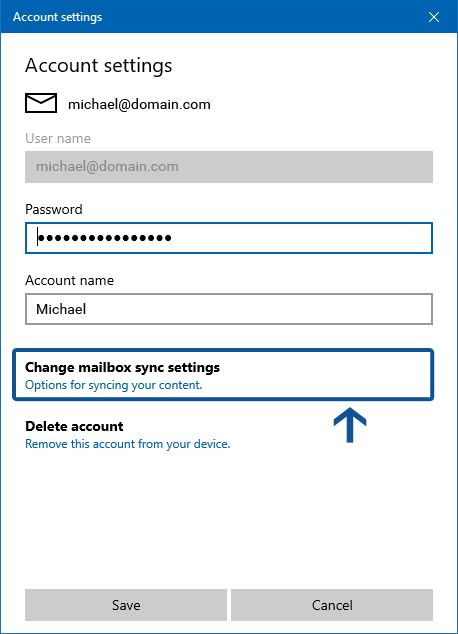
- Select “Edit Mailbox Synchronization Settings”.
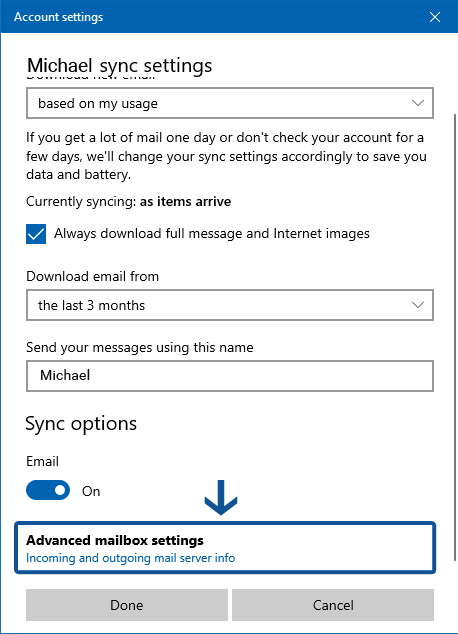
- Then click the “Advanced settings” of the mailbox at the bottom.
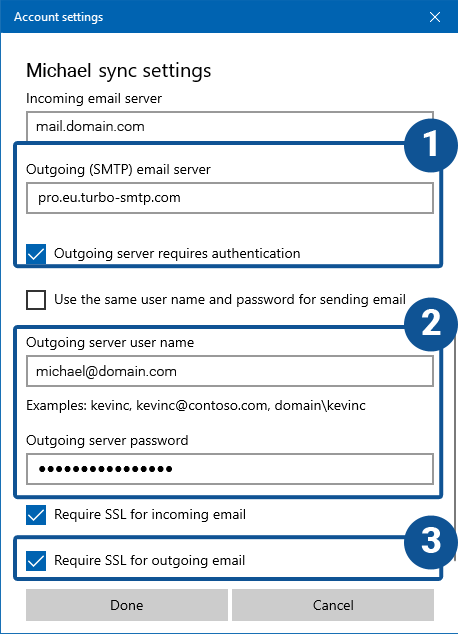
- Scroll down to configure the turboExecutive SMTP server by entering the following parameters
–Outgoing mail server: pro.eu.turbo-smtp.com
–Outgoing mail server name: The Consumer Key (see how to create your API Keys)
–Password server outgoing: The Consumer Secret (see how to create your API Keys)
–Require SSL for outgoing mail: Yes
Click “Done” to confirm the changes, then “Save” to return to the main Mail window.
How to set up a new account
- Start the Windows Mail application.
- From the bottom left menu, select the gear icon, then “Manage account”.
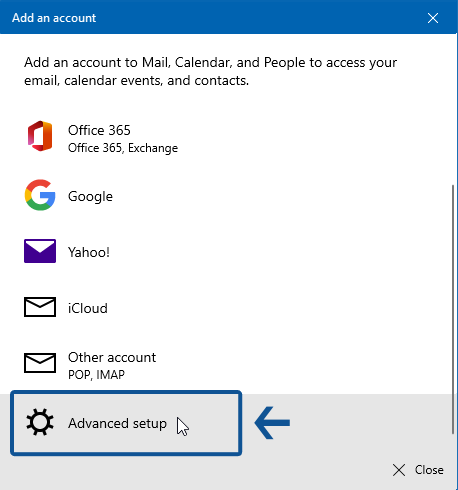
- Select “Add account”.
- Choose the type of account you want to create. (In this example, we will use a domain address like name@mydomain.it). Select “Advanced configuration”.
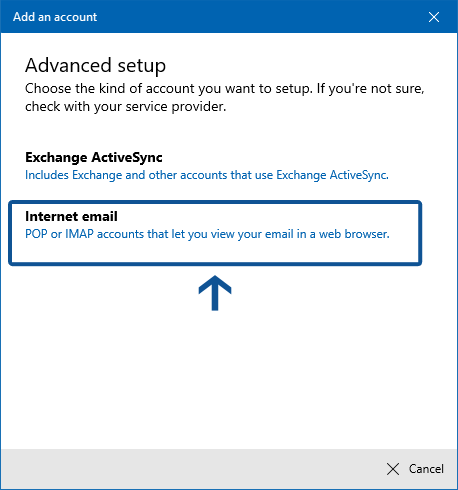
- Then select “Internet Mail”.
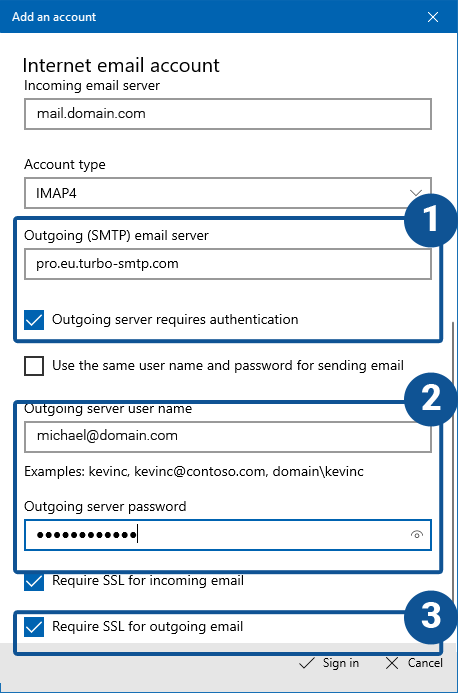
- Configure your incoming email account information by entering the parameters provided by your email provider. (An example of these settings are shown on the screen).
- Scroll down to configure the turboExecutive SMTP server by entering the following parameters:
–Outgoing mail server: pro.eu.turbo-smtp.com
–Outgoing mail server name: The Consumer Key (see how to create your API Keys)
–Password server outgoing: The Consumer Secret (see how to create your API Keys)
–Require SSL for outgoing mail: Yes
Click “Login” and wait for verification.
